Beautifully designed to be showcased and integrated into any environment, the WaterRower indoor rowing machines are renowned for their blend of quality, aesthetics, luxury, and experience. Like any high-quality piece of equipment, WaterRower maintenance is important for optimal performance, efficiency, longevity, and re-sale value. In this article, we share 5 tips for WaterRower rowing machine maintenance so you can continue to crush your fitness goals!
Table of Contents
1. Start on the right foot, keep things tight
The WaterRower will adjust to your environment’s temperature and humidity in the first couple of weeks in a new environment. This means it’s a good idea to simply check and gently tighten up screws and bolts all around the WaterRower with the 5mm Allen key that’s conveniently stored under the rear spacer which is located by the back of the machine between the sides - see the image below.
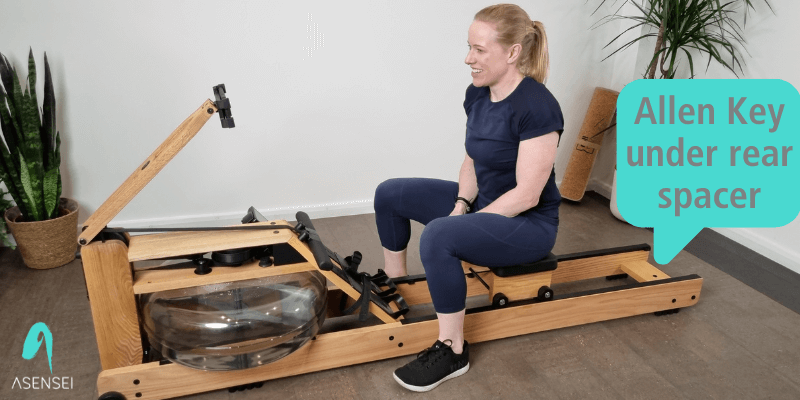
Location of the WaterRower allen key on the rowing machine
Secure screws and bolts
We’ve all experienced the hassle of missing loose screws and bolts with our everyday equipment. To prevent this headache and possible injury due to an unsecured frame, it’s important to note where the screws and bolts are secured in the WaterRower so we can make sure they’re still in place. Take your Allen key and your screwdriver, and go through the entire WaterRower. Checking on all the bolts and screws on the forward assembly in front of the tank, the wheels, side rails, seat, hand bracket, and foot plates will ensure a safe experience going forward. Ideally, you'll check this regularly, every month or two. See the video below for more details.
Checking screws on your WaterRower: screw locations
While you check and adjust all the bolts and screws, make sure to only tighten firmly and not damage the parts. If your screw and bolts go missing or parts are damaged, you can easily find replacement parts provided by WaterRower.
Tighten Your WaterRower Bungee Cord
During the first month, it is recommended to ensure the bungee cord is tightened properly as the drive and recoil belts may loosen with use. To tighten the bungee cord, gently rest the WaterRower upright and find the bungee pod on the bottom of the rear spacer. You can use your 5mm Allen key to ensure that the bungee cord is securely fastened in place.
2. WaterRower Tank Cleaning - Keep the water clean
Unlike any other rowing machine, the innovation of WaterRower enables an experience that sounds like you’re rowing in a boat in the comfort of your home or gym. To ensure you get to continue rowing with proper resistance and the relaxing sound of swishing water, it’s important to maintain the condition of the water to prevent the forming of algae and mold in the tank.
What type of water should you be using?
When you first unbox your WaterRower, you might ask yourself what type of water to use? Should you use distilled water? It is strongly recommended to use municipal tap water which contains chlorine which keeps it free from bacteria and algae. Distilled or purified water will actually promote algae growth as they have additives removed.
What level should I fill my WaterRower to? Depending on your WaterRower model, you can refer to the Level Gauge sticker located on the side of the tank. The advised volume for you WaterRower Tank is: 15.223 L = 15.223 kg = 33.561 Lb = 4.021 gallons
Purification
Purification tablets are provided in the back of the owner’s manual. It’s recommended that the purification tablets are added every 6 months. If you need more purification tablets, you can request them free of charge on WaterRower’s website by filling out this form.
Do not put chlorine bleach into the WaterRower Tank as the polycarbonate tank may be weakened and irreversibly damaged.
Emptying, cleaning, and refilling the tank
A common question many ask is, do you have to change the water in a WaterRower? Although WaterRower suggests that there is no need to clean the tank regularly, you may notice that your water will start to discolor and get cloudy after a few months. If this is the case for you, we suggest emptying your tank, cleaning, and refilling it with clean water.
How do you remove water from a WaterRower?
Removing water from a WaterRower is easy! You can siphon the water out of your tank with a WaterRower hand siphon pump and a bucket.
Step 1: Remove the cap cover of the tank
Step 2: Place the straight end of the pump into the water tank, and the flexible end of the pump into a bucket
Step 3: Ensure the cap is tight on your hand pump
Step 4: Squeeze the pump and water should start to flow out from the tank and into the bucket!
Video guide to emptying the WaterRower tank
After you’ve successfully emptied the tank, rinse and flush out the tank with more clean water a few times to ensure that there are no remaining bacteria and algae that can set in. Happy with how clean your tank is? Go ahead and add a purification tablet!
3. Keep your WaterRower hardware clean
The varnished natural wood makes the WaterRower one of the most aesthetically pleasing pieces of equipment in any home and gym. You’ll want to keep the frame and hardware nice and clean with dusting and polishing occasionally. Dust build-up will occur on the belt, rails, wheels, and more so you’ll want to run a damp cloth along the machine from time to time to prevent residue from accumulating.
Better yet, WaterRower offers a protective cover that ensures the machine’s protection from dust and high humidity.
4. Keep the recoil belt aligned
On occasion, you should check the alignment of the recoil belt, which is connected to the handle, as it may come misaligned. The misaligned recoil belt may compromise the smoothness of the stroke and may lead to fraying of the belt. The recoil belt should sit flat in the center and should not be twisted. After ensuring alignment of the recoil belt, take a few strokes to ensure it’s properly installed and running smoothly.
Check the bungee cord
Over time, the bungee cord may slowly degrade and lose elasticity which will affect the recoil of the WaterRower. A poorly adjusted recoil means you won’t be pulled back as fast as you want causing your performance to drop. If this happens, the bungee cord will need to be replaced. To do so, remove the bungee cord from the recoil belt and position the new one into place on the rear bumper. Here are some quick steps on how to replace the bungee cord on the WaterRower.
Step 1: Gently lift up the WaterRower and rest it upright
Step 2: Detach the bungee cord from the recoil
Step 3: Use your 5mm Allen key to undo the bungee pod from the rear spacer
Step 4: Attach your new bungee cord and use your Allen key to securely tighten
Step 5: Attach your new bungee cord to the recoil belt and gently place your WaterRower back into position.
Step 6: Take a few strokes and check if the resistance is smooth and consistent
Instructions for replacing the bungee cord on a WaterRower
Replacement bungee cords can be purchased directly on WaterRower’s website.
For more instructions, see WaterRower’s documentation on Single Bungee Replacement.
5. Bonus tip: Protect your floors with a non-slip mat
Here’s a bonus tip to not only protect the bottom of your machine but also your floor. An intense rowing session means floor scuffs, scrapes, and a lot of sweat so we suggest grabbing a non-slip mat to place under your WaterRower.
WaterRower Maintenance - Conclusion
Like all things, attention to small details makes a big difference. WaterRower Maintenance is simple but many overlook and forget about doing so. Follow this guide and refer to the WaterRower ‘Preventative Maintenance and Troubleshooting Guide’ for more information on how to keep a healthy machine.
DOWNLOAD ASENSEI FOR FREE
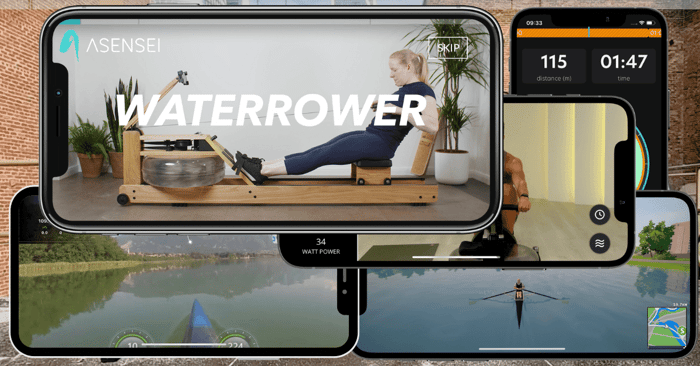
asensei is now compatible with WaterRower rowing machines with Bluetooth support. This means that great indoor rowing workouts and training programs from asensei's coaches such as Eric Murray, Dark Horse Rowing and Johan Quie are now available for WaterRower users for the first time.
|
asensei is FREE to download and with no commitment you can trial the first 3 workouts in the (RE)COMMIT program and also workouts from MASTER THE BASICS, (RE)FOCUS, SWEAT FACTORY and BE A DARK HORSE. All you need is an iPhone and access to an asensei Compatible rowing machine from Concept 2, WaterRower or FluidRower with a bluetooth capable monitor. |

