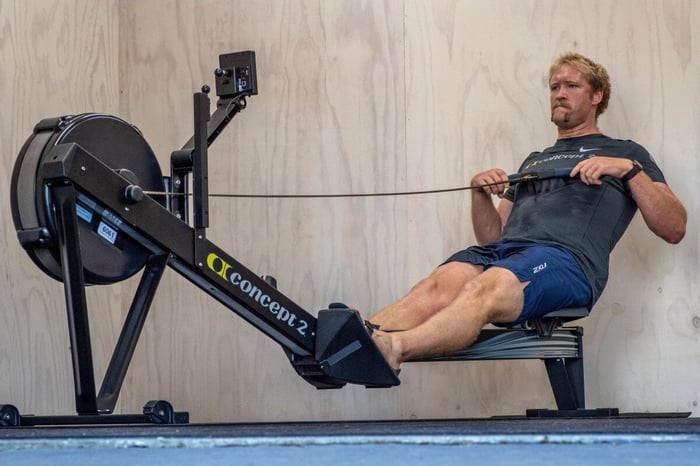
The rowing stroke is a combination of the drive and the recovery. In each phase, there is a final action which completes the rest (recovery) and the push (drive). These are called the Catch position and the Finish position respectively. The indoor rowing Catch, which is the focus of this article, is the action you take at the beginning of the rowing stroke. During this movement, the handle is the closest it will ever be to the flywheel (or water tank) at the front of your rowing machine. The Finish is the final part of the drive phase which completes the rowing stroke. At this point, your body is sitting tall, shoulders behind the hips, legs pressed against the footplate and the handle is sitting at the bottom of the ribcage. In this article, we will explore how to practice and perfect the indoor rowing Catch, with expert coaching from two-time Olympic Gold Medallist Eric Murray who provides two key drills for you improve the movement.
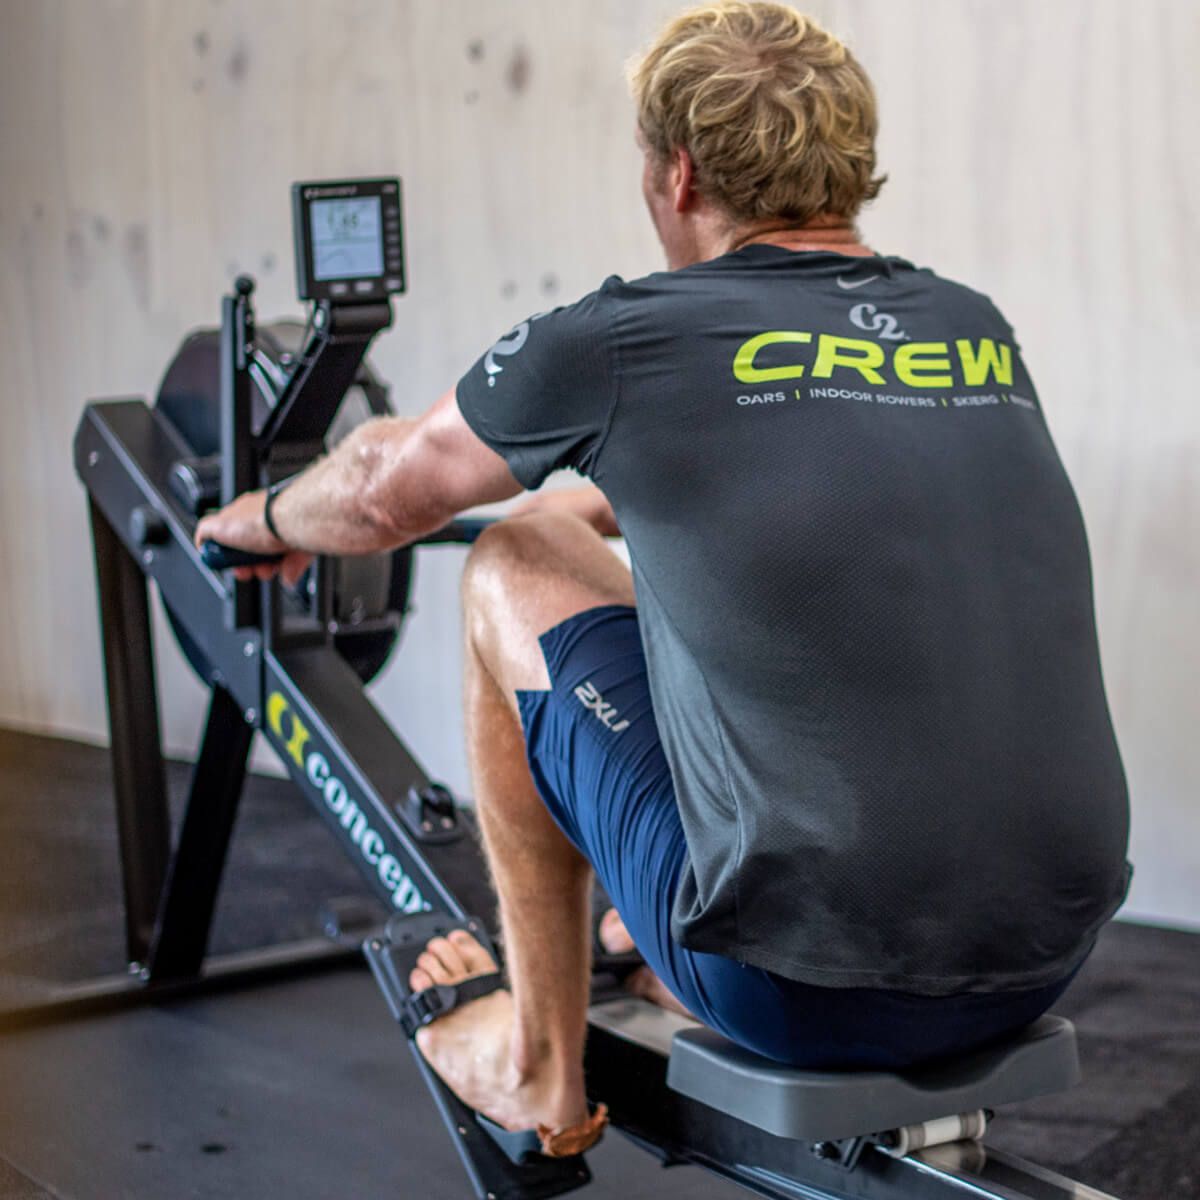
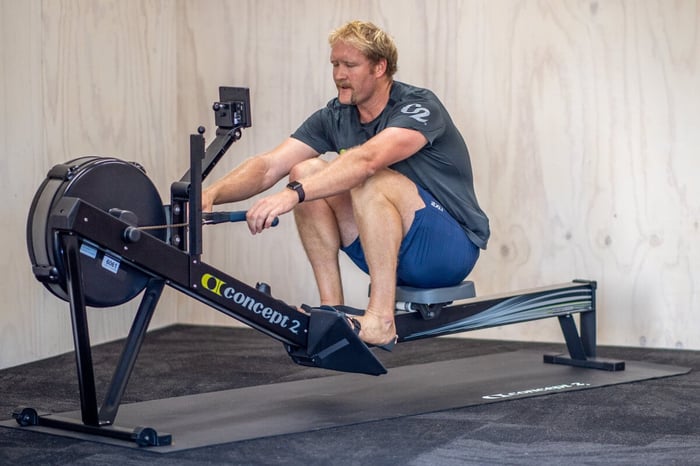
Rear angle of the Catch - shins are vertical, feet are in a comfortable position, back is tall and engaged, arms are extended and loose.
Let’s first understand why this section of the rowing stroke is called the Catch. When an on-water rower reaches this point, they will place their blades into the water, signalling the end of the recovery phase. The action of the oar(s) entering the water whilst the boat is in motion signals the Catch. On land, we use an indoor rowing machine (also known as an erg) for a great whole-body workout, improve technique, build fitness and test athletes in a controlled environment (no wind or currents!). Aside from placing oar(s) into the water, the Catch movement on the erg is the same. The arms should be extended, shoulders in front of the hips, sitting tall up and over your fully-compressed legs and at their closest possible point to the flywheel. It is at this point in the sequencing where you look to develop a connection with the footplate and hang off the handle as you enter the drive phase.
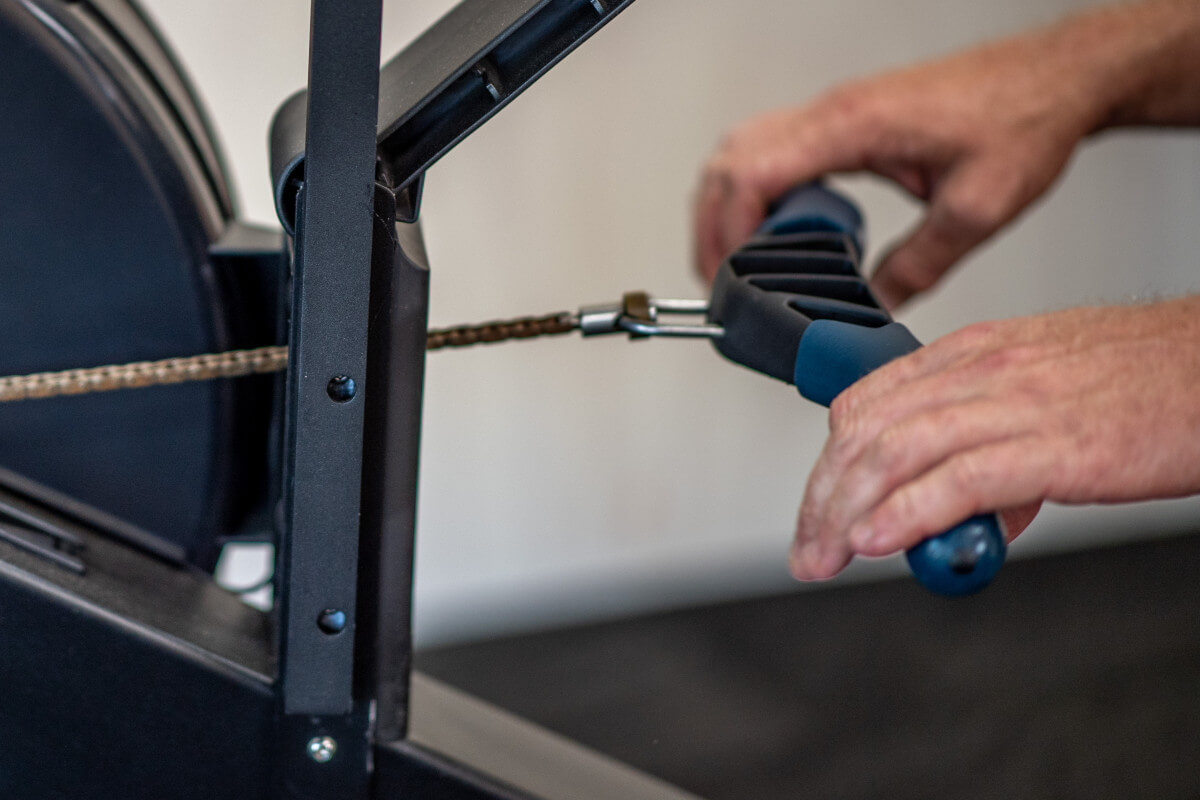
Light hand grip at the Catch - fingers are loose, like they are playing the piano
What does a good indoor rowing Catch look like?
On an indoor rowing machine, the Catch position is when the athlete reaches the front of the slide or the natural point at which the body feels like it is ready to enter the drive phase of the stroke (arms extended, body forward, sitting tall, seat as far forward as possible without hunching or feeling uncomfortable). The characteristics of a good catch are pretty similar on an erg as they are in a boat; shins should be as close to vertical as possible, glutes and lower core muscles are engaged, shoulders relaxed, and arms loose. After reaching this position, your next step will be to engage the legs in the opposite sequencing to how you arrived at the catch (leg drive, body swing, arms through). The actions taken here will impact how well you can connect with the footplate and how effective your stroke is. The arms are merely used for connecting the handle to your legs and body. Taking a step back, the rowing stroke involves driving with the legs, shoulders and arms relaxed, before opening the hip angle and shoulders to keep the distance between the body and erg handle. There should be no lifting the shoulders nor snatching with the arms.
Eric Murray On the Catch
One of the best guides on how to perfect the Catch comes from Eric Murray, double Olympic Champion and asensei coach, during the Q&A at the end of one of his YouTube Workout Livestreams. He explains that the Catch should feel fluid. Sitting in this position can be strenuous on the body so there shouldn’t be a pause when reaching the point where you take the stroke. In the video excerpt below (at 59:28), he notes the uncomfortable feeling in your ankles when reaching the Catch, which should naturally encourage you to take the stroke as early as possible. If anything, as you approach the Catch position, you should already be thinking about driving back.
Eric Murray talks about the characteristics of a good indoor rowing Catch (clip is about 90 seconds)
From 59:50 onwards, Eric emphasises the importance of a 'rounded' feeling to this section of the stroke. He encourages you to leverage the energy generated in resistance from your ankles and knees at the Catch to maximise power when driving off the footplate.
Drills to improve your Catch
Eric has two exercises you can do to improve your technique at the Catch and ensure you have created a hanging connection from the footplate right through the body to maximise the drive phase of the stroke.
Straight Arm Exercise
The Straight Arm exercise, as shown in the video clip below from an asensei Livestream workout Q&A, focuses on keeping arms and upper body fixed (no movement) whilst practising the seat rolling forward followed by the leg drive. After you’ve repeated that as many times as you feel comfortable (Eric recommends sets of five to then strokes), you can incorporate opening the hip angle before finally using your arms to complete the stroke. This drill isolates the leg drive and allows you to practice the hanging off the catch without using your arms or opening the body too early.
Eric Murray demonstrating the straight-arm drill to improve feeling around the Catch (front of the rowing stroke).
Reverse Pick Drill
From 1:02:30, Eric also discusses the Reverse Pick Drill. This focuses on isolating the Catch by rolling into the front from half-slide. The emphasis here is not on power but on finding space at the front of the stroke to ensure you can maximise connection in the middle (where your legs and body are fully engaged). Eric explains that a lot of people grab at the Catch, trying to force connection at the beginning of the stroke but sacrificing the ability to generate optimum power when the strongest parts of your body are engaged. This drill allows you to simulate that connection point and improve your sequencing after the Catch.
Eric Murray demonstrating a practice drill to improve feeling around the Catch (front of the rowing stroke).
Summary
The Catch is a critical component of the rowing stroke and, when mastered, allows you to generate a hanging connection between the footplate and the handle. Done correctly, you should experience a stronger drive phase through higher power output and a smoother force curve. To recap, prepare for the Catch during the recovery phase by practicing arms, body, legs. As you approach the Catch, relax the shoulders and maintain a loose grip on the handle. At full compression, it is time to suspend your body between the handle and the seat by pushing with your legs. Time to practice!
DOWNLOAD ASENSEI FOR FREE
For more tips like this, but while you workout in a personalized and structured training program, try the asensei app for free. Rowing training is better in the asensei app. You will have all the key stats displayed on screen during your session, you will have asensei set you personalized goals, you won't need to program the machine or take note of your results, asensei does it all.
|
asensei is FREE to download and with no commitment you can trial the first 3 workouts in the (RE)COMMIT program and also workouts from MASTER THE BASICS, (RE)FOCUS, SWEAT FACTORY and BE A DARK HORSE. All you need is an iPhone and access to an asensei Compatible rowing machine from Concept 2, WaterRower or FluidRower with a bluetooth capable monitor. |

